Thursday, August 24, 2023

Use This Blogger Theme And Get Approval | SEO Friendly Theme | Responsive Theme |

Use This Blogger Theme And Get Approval 2020 | SEO Friendly Theme | Responsive Theme |


 Adsense Approval Theme | How To Apply Or Change Theme


Hello there, This is Ismail. Like you, I am crazy about changing the theme for my blogger. At starting, I spent much more time finding blogger themes than writing an article because I wasn’t found a proper template for my blogger. Always I thought about whether this theme will approve my site or not for Google AdSense.

Because it matters a lot how the website is looking friendly and well appropriately designed and optimized, each element matters in the website’s look. Users should be attracted to your site. I mentioned this blogger theme free is suitable for Adsense approval.

So, after changing many themes I finally found one of the AdSense approval themes that is SEO Friendly
blogger theme for adsense approval
blogger theme for AdSense approval

Flat Blog Theme – Best Blogger Theme For Adsense Approval

This theme really attracts me first. Then I confirmed that the users will interact with my site. So immediately I downloaded the .xml file and uploaded the theme into Blogger then I customized it.
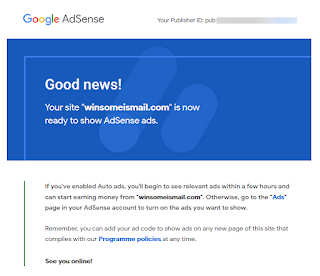
Will Google AdSense Approve 
Of course yes, because there is no problem with layouts. I observed when I install and set up a theme, there is no extra gap. Theme is excellent with Desktop and mobile screen friendly. Finally, you will get approval from Google within a few days.
 

Why This Blogger Theme?

If you read the below features you won’t rise this question again. Yes, because there are a lot of plus points to your websites. I only recommend this theme for your blog. Don’t worry about Adsense approval. If your article is unique and contains more than 25 topics and has Contact Us, About Us, and Privacy Policy. All of this is mandatory before applying.
 

Major Important Points Before Applying Adsense

Before applying you must be clear about your niche. Check mobile-friendly and preference languages. This page is a must About Us, Contact Us, Privacy Policy, and Disclaimer is optional. To generate these pages you can google are write yourself. The next responsive theme also matters. The second thing is your articles are unique don’t use copy-paste. Before applying AdSense make sure to check for plagiarism, you can find tools for plagiarism like a Plagiarism detector and small SEO tools. Your articles or posts are more than 25. Purchase top-level domains like .com, .in, .online, etc, Now your site is ready for AdSense approval. Getting approved within a few days max is 2 weeks.
 
Don’t be excited to apply Adsense without these fulfilling points. The reason is you will be waiting list for months for second-time approval after being disapproved.

Theme Name Flat Blog Template

The flag blog template is an attractant theme. This theme can be used for under niches News magazines, and Professional bloggers and includes so many features. It includes more than 10 various recent/random/label post widgets. This theme also includes a slider for a news ticker. Among these widgets, you can easily create your own professional or personal blogger looking like me. It loads with a mega menu, 3 Various types of post layouts, Social media followers counter.
 

Features Of This Theme:

  • Blogger Templates Footer Credit –  You can remove footer credit by editing Html
  • Free Responsive and Attractive look
  • High Quality with slide Menu
  • Google Testing Tool Validator
  • Sub Menu and also
  • Mobile Friendly
  • 404 Error page if URL is unavailable
  • Drop Down Menu
  • News ticker
  • Recent and random post
  • Google AdSense Approval
  • Blogger Template with multi layouts
  • Social and search engine readable metatags
  • SEO  friendly optimized
  • Blogger Template Adsense Optimized
  • The theme for real Adsense Approval
  • Use For lyrics niche
  • Fast Load Blogger theme
  • Related posts with thumbnail
  • Customized comments
  • Categories with different colors that change each page refresh
  • Contact form
  • Subscribe follow by email
  • SEO setup Blogger Template
  • Blogger Template Free Download
  • SEO Responsive and attractive Blogger Template
  • Blogger Templates Free Responsive
  • Easily remove or modify Footer Credit
  • Blogger Template For also Affiliate Marketing
  • Fully Unlocked With All layouts, widgets, and Features
 
So, you don’t need any other extra layouts and widgets all important gadgets include in this theme itself. You just plug in this excellent theme and go for writing your articles.
 

If the above download button doesn’t work please visit the site to download theme.

Solved Queries In This Article

  • Professional blogger templates free
  • Free customizable blogger templates
  • New blogger themes
  • Education responsive blogger template free
  • Simple blogger templates free
  • Clean blogger templates
  • Premium responsive blogger templates
  • Free blogger templates 2017
 

How To Apply A Blog Theme?

After downloading the theme, open with a text document (Notepad, Pdf, or Html viewer).
Copy all text without missing any code and brackets even
Now login blogger dashboard
Select the theme option from the menu
Click on the down arrow
Use this blogger theme and get Approval 2020 | SEO Friendly theme | Responsive theme | Adsense Approval Theme | How to apply or change theme
 Click on Edit HTML then paste the code and save as from the below images.
Use this blogger theme and get Approval 2020 | SEO Friendly theme | Responsive theme | Adsense Approval Theme | How to apply or change theme

About This Article

I solved the problem for those who are still finding themes or templates for their blogger site. This article cleared the best theme and their feature, which is best to use for AdSense approval, Responsive, and SEO, and shows how to apply the theme If you like this theme please subscribe to this site, and do you have any queries please comment below. I will write you back soon. Thank You.


Conclusion:

This article covered blogger themes that where you can download. Blogger themes are free. Blogger theme free download can be available on websites like gooyabites. You will find the best theme for blogger websites.

How to Post YouTube Videos on Facebook with the Big Thumbnails

How to Post YouTube Videos on Facebook with the Big Thumbnails


hey, guys, we'll come back to the Tech Pro Advice

in this post, I gonna to show you how to post YouTube videos on Facebook with the big thumbnails.

so just in case in my upload particular video on your channel and then you want to transfer back that same thumbnail over into maybe your news feed or your Facebook fan page with the actual size.

there are different ways how you can do it but this method I'm going to show you guys tonight is to be the most effective ones.

so stay tuned so welcome back guys and so 1280 by 720 is an actual size for YouTube you can also have 1080 as well

so first you need to go back into your account and then go to edit and then you go to your URL of the video

so on the far right here so you just copy that one and then you go down to advanced settings and then we want to do you could go over to the left-hand side so where you have this box here that says allow embedding you don't know click

or you said untaped and then gonna press saved

and then the next step you want to go to google and then you're gonna search for a Facebook debugger

so it's not the first one that comes up the second one here so this is not third policy directly from Facebook so all you have to do is click in that one copy and paste the URL link of that same video in the side here and then you're gonna click and debug you're gonna go fetch me information

and then these are all the details regarding that same video so we're gonna do now we have scrape again you know select scrape again and that's it

so we're gonna do for the last step is to go back to the actual video over on your channel and then you know clicking are you sick copy back to the same URL and then you gonna take it over to your actual channel or your facebook fan page

sorry and then you're gonna paste it over here so let's say for example to write something here and there have it the actual size of the same 1280 by 720 of being converted back over to Facebook so all I'm gonna have to do now I'll probably stay there someone just drop the rubber title [Music]

so let it refresh and now we have it the actual size of the thumbnail has been converted over here and Facebook so like I said all that I'm gonna do clicking that and it takes me back straight to the actual video but on my channel

so if you're happy with this result so like I said it's quite easy so all you have to do is to select the video that you guys need to transfer that thumbnail over to your Facebook fan page it's all you're gonna do like I said copy the URL you can go down to advanced settings and then you're gonna go down right here we have allow embedding and you're gonna just uncheck that one and save bring it over into this site here which called the Facebook debugger

and then you're gonna copy and paste that URL then you can go to debug and then the next step you just go scrape again and then I can say to go back to the video as well and then you're gonna grab the URL itself and then you take it back over to your Facebook page

and then that's we're gonna paste it so like I said it's quite simple so like I said thank you very much guys to hang out one more time with me please like share and subscribe to my channel for more videos about YouTube marketing Facebook marketing and any social media marketing topic that you guys are interested in too you can see that on my page over here on YouTube so thank you very much and a half blessed day thanks


How to Add “Click to Call” Buttons on WordPress in 1 Minute!

How to Add “Click to Call” Buttons on WordPress in 1 Minute!


How to Add “Click to Call” Buttons on WordPress in 1 Minute!


hi, guys, my name is Hasan from Tech Pro Advice and today I'm going to show you how to add click the call buttons on your WordPress website or blog.

ok so click the call buttons are  basically a little button that's going  to show up on the bottom of your website  but they're only going to show up to  your mobile visitors then when they  click the button if their phone is going  to ask them if they want to call that  number which will be your number then  when they click yes they will call  straight through to your number whether  it be your business or your mobile or  whatever.

it is so to add these click the call buttons to our site all we need to do is install and activate a free plugin.

so just click on the left-hand side where it says plugins and then up at the top click add new now in the search bar in the top right just type the words call now button then hit Enter on your keyboard to search.

and it should be this first one once you find it just click  Install Now and once it's installed we can activate the plug-in now on the left-hand side.

just click settings and under that click call no button here we can enable or disable the call now button and underneath we just need to enter our phone number.

I'm just going to enter a  fake one here and up at the top, we can also change some advanced settings.

such as the color of our button we can change that we can also change whether we want it to appear in the right corner the left corner or take up the full bottom part of our site.

we can also track it using Google Analytics and then underneath we can enter IDs of posts and pages that the call now buttons should appear on.

and if we leave this blank  it's going to appear on all of them I  recommend leaving it blank and then  underneath we can just see if our  changes now when we visit our site  because I'm on my laptop we're not going  to see anything but if we just go over  to the plugin page you'll see here this  is what it's going to look like .

so if we click on screenshots you'll see  here this is what it's going to look  like on the right-hand side this is what  it's going to look like on the left-hand side if we make it orange and then this  is what it's going to look like if we  make it take up the full bottom as you  can see this has 33 reviews and all five  stars out of five.

so that's how you add click the call buttons to your WordPress website or blog.

I hope you find this  Post useful and if you have please give it a like and feel free to subscribe to my channel for more WordPress tutorials like this one once again my name is  Hasan from techproadvice.com and thank you very much for Reading my Post.


How to Add Ads.Txt File in Blogger?

How to Add Ads.Txt File in Blogger?


The advertising is the primary key for a publisher to come up with cash. The ads are often several types.

and there are many ads providers that help publishers to create cash from their blogs.

But, it's very necessary to see the authenticity of the ads that are shown on a specific website.

The verification of ads shown on a website can be achieved by ads.txt file. An ads.txt file secures each publisher and advertiser from frauds or viruses. this can be essential to feature the ads.txt file on your website or blog, therefore here we are discussing how you'll simply add the ads.txt file in your BlogSpot blog.


Before adding the ads.txt file on your blogger blog, allow us to understand what specifically is ads.txt and how is it getting to benefit North American country.

The “Ads.txt” is just a text file which will be placed on your blog's server and carries data regarding the advertising networks used by the blog's owner and the owner approved these ads networks to show ads on the website. the most plan behind using this ads.txt file is to protect publishers from frauds and viruses as you may only authorize those ads network to show ads on your website that you are responsive to and therefore any malware script that showing ads on your blog without your permission from any unknown sources, cannot perform the task it ought to do.

How To Generate Sitemap Code For Blogger And Remove Domain URL Code ?M=1 For Mobile Browsers

How To Generate Sitemap Code For Blogger And Remove Domain URL Code ?M=1 For Mobile Browsers


1. How To Generate A Sitemap Code For Blogger And Remove Domain URL Code ?M=1 For Mobile Browsers 

How to generate sitemap code for blogger and remove code ?m=1 for mobile browsers
Image credits: Pixabay

Are you looking for the best site to generate .XML Sitemap for your blogger and trying to add indexed posts in blogger settings?

If yes, you reached the corrected page. This is an informative post for new bloggers trying to set up their blog SEO. Yes, it is one of the SEO parts for blogger posts.


In this post you are going to learn two things one is how to generate a sitemap for your blogger website and how to remove domain URL ?m=1 code in mobile internet browsers. Let’s look into website that is too old and specially used by bloggers. The name is Labnol.org here you can generate it easily by pasting your website URL in one click. You will see the next below steps. Before that know, what is XML?

What Is XML?

It stands for eXtensible Markup Language. Every website developer needs XML for a better understanding of users. On a website, XML is a page where you can find all the posts or article links on a single page by category. Generally, XML is used for all different IT sectors.
 

How To Generate Sitemap Code For Blogger And Remove Code ?M=1 For Mobile Browsers

After pasting your URL click on GENERATE SITEMAP. Next will load with the sitemap code as mentioned below the image.
Copy the above code by ignoring the first two lines which start with # hashtags. After copying the XML code go to the blogger dashboard then settings and find custom robot.txt click on its box will open paste in and save it.
 
How to generate sitemap code for blogger and remove code ?m=1 for mobile browsers
 
After all, keep in mind and be assured be enabled the remaining below features. Settings in blogger itself. Do you Enable custom robots to head tags?
  • 1. HOME PAGE TAGS
  • > Enable ALL and No dp 
  • 2. ARCHIVE AND SEARCH PAGE TAGS
  • > Enable only no index and no dp
  • 3. POST AND PAGE TAGS
  • > Enable all and no dp
How to generate sitemap code for blogger and remove code ?m=1 for mobile browsers
Read also: How to add meta tag description in blogger to rank our website?
 
  • 2. ARCHIVE AND SEARCH PAGE TAGS
  • > Enable only not index and no dp
How to generate sitemap code for blogger and remove code ?m=1 for mobile browsers
  • 3. POST AND PAGE TAGS
  • > Enable all and no dp
How to generate sitemap code for blogger and remove code ?m=1 for mobile browsers

2. How To Remove ?M=1 Code In The Domain URL For Mobile Browsers.

The problem I am sharing here is almost every blogger might face it and doesn’t know what the real solution is. Actually, when you load your website in a mobile browser you’ll find your URL along with ?m=1 eg: www.winsomeismail.com/?m=1 it looks like you are not professional to be removed that code you need to modify in blogger HTML code.

How to generate sitemap code for blogger and remove code ?m=1 for mobile browsers

To change the HTML code go to Theme > click on 3 dots and select HTML. Click on Ctrl+F to find code in HTML. Type </body> and enter once above the body closing tag and paste one code that I shared with you in the download button. Then click on Save to save blogger HTML.

How to generate sitemap code for blogger and remove code ?m=1 for mobile browsers


You Might Also Like This: Now Add A Sitemap On Google Webmaster

How to Shutdown Windows 10 Automatically

How to Shutdown Windows 10 Automatically


welcome to Windows 10 auto-shutdown tutorial

to automatically shut down your machine which runs Windows 10 you coming the third bar and you take down this simple client shut down space - f space - T and then you're going to type down the number of seconds

you only washing to wait until it automatically shuts down

so let's say I need one hour I'm going to take down three six double zero this is 3600 seconds which means one hour right.

so let's press ENTER and now let's say you decided to cancel this month how to console each you come to the search bar

then type down shut down again I'm just nice to shut down space - an under you wanna press ENTER and this has canceled the shut up auto shutdown.

the command you have just given so

let's say you do not have the search bar this is the way to make it appear so you're going to come into the taskbar right-click going Cortana show search box and then you're going to have the search box and you can perform the actions

I have just shown you so this is how to automatically shut down your machine in Windows 10.

please subscribe and I'm gonna make more videos just like this one pick up

How to Secure WordPress Website using iThemes Security

How to Secure WordPress Website using iThemes Security


hi everyone in this Post I gonna to show you over five Method to secure and Protect your WordPress website.

now thankfully most WordPress hacks are completely preventable and in this Post, we're gonna give you the tools that you need to lock down your site.

the first tip keep your software up-to-date


now the very first tip we have for use to keep your software up-to-date. updates not only include cool new features and bug fixes. that can also include critical security updates.

not too long ago Apache release in the news that they had a security vulnerability which was easily exploited in a version of their software.

thankfully when they released that news they also released a security patch to squash that vulnerability, unfortunately, equi hacks didn't heed this warning which led to someone taking advantage of the exploit and compromising their site which led to tons of people's information being breached.

now how they just updated and passed this exploit that would never happen so they officially have no excuse and neither do you when it comes to updating using the I theme security Pro version management feature.

you can automatically update or press core plugins and themes so you can rest assured knowing you had the latest security patches on your site.

Use Strong Passwords


the next tips we have for you is to use strong passwords. it's important that you do not reuse passwords and have a unique password for every site I would suggest you use a password manager like LastPass this way you can easily generate random and secure passwords you can keep track of all your unique and strong passwords and you can take advantage of the autofill feature you will also want to have a password management plan for all your privileged users using a WordPress security plugin like Itheam security Pro you can force all your privileged users to use strong passwords you can also refuse the use of compromised pastures I think security Pro-Tex advantage if they have I've been pawned API the have event pond API has a list of credentials that are known to be compromised this means any time a user is changing a password on your site it will quickly run it against the known compromised credentials allows you to refuse the use of any known compromised password.

Two-Factor Authentication


the next step we have for you is to use two-factor authentication for your logins two-factor authentication has a very strong layer of security by requiring a unique token along with the username and password in any method a two-factor is better than none but some are better than others if at all possible try avoid using the text messaging method of two-factor as it is the least secure of all your options I would recommend using the mobile app method for two-factor you can use a mobile app like Google Authenticator or Athene to receive a time-sensitive token in order to login using either your security Pro you can easily configure two-factor for all of your users.
Run Malware Scans

the important we have for you is to run malware scans it is important to consistently audit the health of your site you want to know as quickly as possible.

if your site has become compromised so you can take the necessary steps to get it cleaned. Itheme security Pro will automatically scan your site twice daily using the security malware scanner.
Backups of Your Website

the fifth tip is to make backups of your website it's important to create a backup schedule that stores your backups offsite you will also want to make sure that you're automatically scanning these backups for malware you'll want to practice restoring your site from a backup so you're familiar with the process the reason why having a backup schedule is so important to your site security is allow you to quickly restore to a state prior to the site being compromised using backup buddy stash live you can automatically back up any changes made to your site the encrypted backups will be stored on an off-site location and automatically scan for malware I'm including a link in the comments to a webinar I did over the same topic I will have much more detailed coverage over every single tip and please don't forget to subscribe if you want to see more coverage of all things WordPress

How To Create A Free Website In Blogger – Blogspot.Com

How To Create A Free Website In Blogger – Blogspot.Com -2023


Table of Contents

How To Create A Free Website In Blogger – Blogspot -2020


Why Do You Require A Website?

Nowadays the internet plays a crucial role. Because without the internet, spending even a single day becomes more difficult for us. So everyone wants a free website to store their personal data, documents, videos, and files. It means you need a website. For personal use, you may use a blogger platform from which you can create a free blog site without purchasing a domain and hosting.
 

Which Platform Is Best To Create A Free Website?

Nowadays there are so many platforms available such as WordPressWixTumblr, and blog spot. Blogspot is a Google product that provides you free of cost to create a website and also provides themes, templates, and layouts. So my recommendation is Blogspot is best to create a website if you are a newbie or you cannot afford to invest in it.
 

Step 1:Sign In With Your Gmail Account

First of all, you need a Gmail account and go with the site https://www.blogger.com you will find the sign in the top right corner side.
 
How to create a free website in blogger - blogspot.com -2020
 

Enter your Gmail id and password even if you don’t have an account you can create Gmail by simply clicking on the signup or create account button. I mentioned my screenshot below just follow that. Gmail is just because it’s a Google product and it stores your data in servers that is the reason to have an account. 

 
Related: Use this blogger theme and get Approval 2020 | SEO Friendly theme | Responsive theme |Adsense Approval Theme
How to create a free website in blogger - blogspot.com -2020

Step 2: Blog Creation

How to create a free website in blogger - blogspot.com -2020
 

Next, you will see the interface as above images, then click on New blog. (This option shows you if you created a site/blog already) to enter your blog title and to set the domain as well. The domain works as an address that takes you to your website if you enter your domain in the URL place. You can find a URL box in any browser to navigate your browser and enter it directly.

How to create a free website in blogger - blogspot.com -2020

Step 3: Give Your Website Title And Domain Name

How to create a free website in blogger - blogspot.com -2020
You need to give a proper title to your website and domain. In this step you need to find a domain whether it is available or not, for example, you need to keep mywebsite.blogspot.com as a domain. But this domain may not available for you because the creation of websites is very huge. .blogspot.com is a suffixed domain it is a default by Google. So give a proper domain name that you can remember easily.
 
How to create a free website in blogger - blogspot.com -2020
 
If your domain name is available(new) then just click on the option. That directs you to the next main page where you can start writing articles or posts.
 

Enter your E-mail address to get more updated interesting posts:

Your best regards – winsomeismail.com

Step 4: Start Writing Posts


Congratulations! Your page is ready to write posts. Now, you can start to upload content, videos, images, and documents and many more after that just publish your articles. Simply from the above image click on the plus button then you will see the next page interface as below.

 
Test your page by entering the web address in the URL(You will see the top left corner on every internet browser).


Step 5: Write And Publish Your Post

You are supposed to write in this white page content area. Can write personal information details, skills.


Features To Write A Post


You are free to use options and features like bold, italic, underline, headers (H1, H2, H3, H4), text size, text fonts designs, text color, fill background text color, undo and redo activities, increase and decrease indent, bullet list, number list, insert or edit link, upload images and videos, emoji, insert jump break, table, format line spacing, line alignment left, right, center and justify, strikethrough, quoted text, format as coding, clear formatting, left to right and right to left layout, input tools.
 
Read also this articles:
 
Use this blogger theme and get Approval 2020 | SEO Friendly theme | Responsive theme |Adsense Approval Theme
 
59 Chinese alternative apps that you can use safely || Indian Developers
 
How to start writing your first blog post?
 
Actually writing a blog is simply interesting, as I have shown below. 
Firstly, just hit the New Post button
 
 
Then give titles, headings, images, videos, and paragraphs and design your content then do SEO optimization better to find your blog on google search.


> Read also: How do I start blogging free from Scratch and make money online (Step by step) – 2020

Now Get Adsense Approval Quick In Blogspot.Com Without Purchase Custom Domain

Now Get Adsense Approval Quick In Blogspot.Com Without Purchase Custom Domain


Now Get Adsense Approval Quick In Blogspot.Com Without Purchasing A Custom Domain

How to get instant adsense approval with blogspot.com domain
 
If you are a blogger, there is good news for you. We know that if we have a website with a blogspot.com domain we need to wait for 4 – 6 months to get AdSense approval. But now, no more. You can get approval like purchased custom domain likewise now we can get approval in the blogspot.com domain as well within a new interface.


First of all, log in to the blogger dashboard. You will find an option “Earnings” left menu. You will see the google AdSense publisher id. If you want to get approval in a new Gmail. Login with that Gmail id. Then click on CONNECT ADSENSE. After that, you will see a message like “Google is reviewing your website”.
 
 
Related Post: Use this blogger theme and get Approval 2020 | SEO Friendly theme | Responsive theme |Adsense Approval Theme 
 
No matter whether your website is 1 or 2 months old. If you have created a blog right now. Immediately you will the same button “CONNECT ADSENSE“.
 

You need to check all the google criteria before connecting to google Adsense. If everything looks perfect, the changes are more to get approval soon.


Below you will find another message that “You need to add domain name eg: winsomeismail.blogspot.com to AdSense”. Now you just copy the domain URL and click on “Go to AdSense”.


The Adsense page will be loaded shortly. You will find the “SITE” option in the left area. Then you will find another option “ADD SITE” click on it and paste the URL then go next. You won’t find any code to paste in HTML. Google will check all of them. That’s it.

Enter your E-mail address to get more updated interesting posts:

Congratulation! now your site is connected with google Adsense. Google takes a time at least 24 hours or it may take up to 2 weeks to review your site. If everything is ready. You will get approval mail. Otherwise not you will get a message as “doesn’t meet our program criteria

Look at mine below that my AdSense approval takes two months, but finally received mail too that my site now can serve google ads. I was very happy.
 
Tips to get AdSense approval is, just do as below before applying Adsense. It is actually easy to get approval for Adsense.
  1. Register top-level domains like .com, .in, .org, .co, etc
  2. Write an original/unique article for at least 20
  3. Build pages like Privacy Policy, Contact Us, About Us
  4. Your site should be secured with SSL/HTTPS://
  5. Apply Adsense 

Welcome to the Gutenberg Editor


Of Mountains & Printing Presses


The goal of this new editor is to make adding rich content to WordPress simple and enjoyable. This whole post is composed of pieces of content—somewhat similar to LEGO bricks—that you can move around and interact with. Move your cursor around and you'll notice the different blocks light up with outlines and arrows. Press the arrows to reposition blocks quickly, without fearing about losing things in the process of copying and pasting.


What you are reading now is a text block, the most basic block of all. The text block has its own controls to be moved freely around the post...


... like this one, which is right aligned.


Headings are separate blocks as well, which helps with the outline and organization of your content.


A Picture is worth a Thousand Words


Handling images and media with the utmost care is a primary focus of the new editor. Hopefully, you'll find aspects of adding captions or going full-width with your pictures much easier and robust than before.


Beautiful landscape
If your theme supports it, you'll see the "wide" button on the image toolbar. Give it a try.


Try selecting and removing or editing the caption, now you don't have to be careful about selecting the image or other text by mistake and ruining the presentation.


The Inserter Tool


Imagine everything that WordPress can do is available to you quickly and in the same place on the interface. No need to figure out HTML tags, classes, or remember complicated shortcode syntax. That's the spirit behind the inserter—the (+) button you'll see around the editor—which allows you to browse all available content blocks and add them into your post. Plugins and themes are able to register their own, opening up all sort of possibilities for rich editing and publishing.


Go give it a try, you may discover things WordPress can already add into your posts that you didn't know about. Here's a short list of what you can currently find there:


  • Text & Headings
  • Images & Videos
  • Galleries
  • Embeds, like YouTube, Tweets, or other WordPress posts.
  • Layout blocks, like Buttons, Hero Images, Separators, etc.
  • And Lists like this one of course :)


Visual Editing


A huge benefit of blocks is that you can edit them in place and manipulate your content directly. Instead of having fields for editing things like the source of a quote, or the text of a button, you can directly change the content. Try editing the following quote:


The editor will endeavour to create a new page and post building experience that makes writing rich posts effortless, and has “blocks” to make it easy what today might take shortcodes, custom HTML, or “mystery meat” embed discovery.

Matt Mullenweg, 2017


The information corresponding to the source of the quote is a separate text field, similar to captions under images, so the structure of the quote is protected even if you select, modify, or remove the source. It's always easy to add it back.


Blocks can be anything you need. For instance, you may want to add a subdued quote as part of the composition of your text, or you may prefer to display a giant stylized one. All of these options are available in the inserter.


You can change the amount of columns in your galleries by dragging a slider in the block inspector in the sidebar.


Media Rich


If you combine the new wide and full-wide alignments with galleries, you can create a very media rich layout, very quickly:


Accessibility is important don't forget image alt attribute


Sure, the full-wide image can be pretty big. But sometimes the image is worth it.


The above is a gallery with just two images. It's an easier way to create visually appealing layouts, without having to deal with floats. You can also easily convert the gallery back to individual images again, by using the block switcher.


Any block can opt into these alignments. The embed block has them also, and is responsive out of the box:


https://vimeo.com/22439234


You can build any block you like, static or dynamic, decorative or plain. Here's a pullquote block:


Code is Poetry

The WordPress community


If you want to learn more about how to build additional blocks, or if you are interested in helping with the project, head over to the GitHub repository.


Thanks for testing Gutenberg!


👋


How Google AdSense Detects Invalid Clicks And Traffic?


How Google AdSense Detects Invalid Clicks And Traffic?


Table of Contents

How Google AdSense Detects Invalid Clicks And Traffic?


How Google AdSense detects invalid clicks and traffic

First Of All, What Are Invalid Traffic And Clicks?

In one sentence Invalid traffic on the website is entered into the website by clicking links intentionally fraudulent to create a fake number of website visitors, clicks, impressions, or publisher’s earnings. Those invalid traffic may include

 
  • Entering into the own websites and generating the live ad clicks
  • Repeating the unwanted ad clicks and impressions will be generated by the single or group users sitting at a time
  • Using the tools and software to be automated ads clicks, these activities will cause invalid traffic and clicks.

So, Google wants always to be genuine user interest. It is strictly prohibited by creating such activities through artificial clicks. According to the Google AdSense program policies, If google detects a high level of fraudulent traffic activities on the specific account/website google will Suspense or terminates or disables your AdSense accounts. Although if there is no quality traffic Google will put limited ads to serve Google AdSense ads on your website which detects fake traffic. Google is smart enough to understand invalid activities.

Google also says that your website may also get invalid traffic without your permission or knowledge. Even though being a bloggers and publisher, it is our responsibility to track everything to ensure that the traffic is valid or not.

How Google Will Prevent Invalid Activity?

Google acts seriously on invalid activity. To detect invalid click or traffic google use both human reviews and an automated system. By using over a century of complex algorithms to figure out fake or abusive traffic as happens in the wrong ways.

Engineers, Data scientists, and researchers work around it to figure out invalid clicks and interactions between users and websites. When they find something fishy will try to mend it or else suspend or disable the advertisement account. Along with those google will hold your payment even for the previous month. Here are the major ways to detect invalid traffic or clicks

Automatic Filters

Google scientists will use over 200 modern filters to stop the vast invalid traffic in real-time. Google’s team continuously works on those filters whether it is been working properly or not.

To End With Invalid Traffic Before It Happens

Those modern filters stop the most invalid traffic from the right beginning. If the traffic is associated with an unacceptable IP address, like if the publisher has a suspicious high CTR (Click Through Rate) or the whole traffic from a single user or IP address, google filters will point it and stops before it executes as traffic.


People also read: 

How do I start blogging free from Scratch and make money online (Step by step) – 2023

How to index a website on google webmaster/Google search console for blogger posts

Unique Ways to Increase CTR, Page Impressions, And Traffic On Your Blog

Removing Confirmed Detected Traffic As Bad

It is not easy to finalize the fraud traffic even modern filters catch it. In some times data scientists will monitor the metrics again until they come to finalize the one result. So it may take several weeks to detect suspicious activity.

Looking Forward To Invalid Traffic

Even Google can’t confirm if modern filters find suspicious activity because no filter is perfect. So google team review manually by their advertisers. It also sets an alert to get to know the unusual spikes in traffic so that they come to know the behavior of traffic.

Stopping Invalid Activity

After all, those analyzing parts will come to finalize whether the account should be disabled or not. If the generated traffic is invalid, google will terminate the account immediately. If the invalid traffic is coming accidentally without knowing the website owner then the owner can appeal their case whose account is disabled.

When it came to knowing again that invalid traffic is acceptable then the account will reactivate again, and will do that right away as well. Publishers have a right to appeal their problem to investigate. Google doesn’t reveal the reason why your AdSense account is terminated.

Will AdSense Be Suspended With Invalid Clicks?

As I mentioned in the Google terms and conditions, Google has a right to ban or suspend the Google Adsense account if it is found invalid traffic and clicks. Sometimes Adsense will penalize and you will get to know through the mail. So if you are a publisher then you must know the Adsense
policies and say big NO to invalid clicks. Read for more.

3 EASY WAYS TO FIX INVALID TRAFFIC & PREVENT ADSENSE BANS

1. Expired Domains

Expired domains are cheap prices and as a result spammy. Because the traffic comes from unwanted sources and audiences. Expired domains will have high Domain Authority (DA). This problem comes an additional with expired domains.

You can fix it by auditing your website to see the traffic from where the domain is redirecting to your website. Also, check all your server log files.

2. Link Building

Link building looks like a master in SEO Techniques but later, you realize that there are ways to crawl those pages by attempting to web crawlers. So these could be a reason to get invalid traffic.

You can fix it by avoiding unnatural places to share content and build links. Never spam your website links by sharing them everywhere and multiple times like in comment sections, forums, and email newsletters with links.

3. Is Your Website Hackable?

Bots are everywhere, from mobile to social media platforms such as Google web crawler (Google bot) these bad crawlers will also be there as well. Because of poor credentials bot actively on-site attacks to crack it and put strain.

You can fix it by changing the CMS admin URL credentials by putting in hard passwords. For WordPress websites, users can install plugin “Enumerated user plugin”. This plugin blocks the Ips from upcoming attackers so that you
should be able to be safe from invalid traffic.

People also read: How to remove or hide a watermark in the Power Director video editing app

                            Best 3 web hosting in affordable and secure | Starts from only 0.99$/month | 59₹ per month in India

Queries solved:

how to check invalid clicks in Google ads,

invalid traffic AdSense,

Adsense invalid click protector,

invalid clicks Google ads,

what is invalid traffic on youtube,

invalid traffic meaning,

google ads invalid clicks refund,

how do I fix invalid traffic on AdSense,

invalid traffic AdSense,

Adsense invalid click protector,

invalid clicks Google ads,

what is invalid traffic on youtube,

invalid traffic meaning,

google ads invalid clicks refund,

Conclusion:

In today’s blog post, discussed How google adsense detects invalid traffic and clicks. First, you will learn about the definition of invalid traffic and clicks. Then how you can prevent invalid traffic? 3 easy ways to prevent fake traffic. If this blog post helps you, please share it with your friends.

Inpage 2012 Free Download

  Windows Inpage 2012 Free Download  DOWNLOAD June 17, 2025 Atta Ur Rehman RaJA Inpage 2012 free download. Inpage 2012 is a new version of t...